Archived Blog Posts
Why Choose SERVPRO of Santa Ynez/Goleta for Your Restoration Needs?
1/3/2024 (Permalink)
 ready and willing to help anytime
When disaster strikes, whether it’s a flood, fire, or mold infestation, the aftermath can be overwhelming. It's crucial to choose a reliable, experienced restoration service that can efficiently handle the situation and minimize stress. SERVPRO of Santa Ynez/Goleta stands out as a top choice in this regard, offering comprehensive restoration and cleaning services. Here’s why choosing SERVPRO of Santa Ynez/Goleta is a smart decision for your restoration needs:
Expertise and Experience: With a strong background in the industry, SERVPRO of Santa Ynez/Goleta boasts a team of highly trained and skilled professionals. They are well-equipped to handle various types of damage, ensuring that your property is restored to its preloss condition efficiently and effectively.
Advanced Technology and Techniques: Utilizing the latest in restoration technology and techniques, SERVPRO ensures that every job is done right the first time. Their use of advanced equipment helps in accurately assessing the damage and implementing the most effective restoration strategies.
Quick Response Time: Time is of the essence in any restoration scenario. SERVPRO of Santa Ynez/Goleta understands this and offers a rapid response to emergencies. Their prompt action can help prevent further damage and reduce restoration costs.
Comprehensive Services: From water damage restoration and fire damage restoration to mold remediation and cleaning services, SERVPRO of Santa Ynez/Goleta provides a wide range of services. This comprehensive approach means you can rely on them for all your restoration needs, avoiding the hassle of dealing with multiple contractors.
Local Presence with National Resources: While SERVPRO of Santa Ynez/Goleta is locally owned and operated, it benefits from being part of a national network of franchises. This combination ensures personalized local service backed by the resources of a national leader in the restoration industry.
Customer-Centric Approach: Understanding the emotional toll that property damage can take, the team at SERVPRO of Santa Ynez/Goleta approaches each job with empathy and professionalism. They prioritize customer satisfaction, ensuring clear communication and a smooth restoration process.
Insurance Liaison: Dealing with insurance claims can be complicated. SERVPRO of Santa Ynez/Goleta assists in navigating the insurance process, working closely with your insurance company to ensure a smoother, more efficient claims process while working for you.
Commitment to Community: As a locally operated business, SERVPRO of Santa Ynez/Goleta is deeply rooted in the community. This commitment translates into a genuine understanding of local needs and a dedication to serving the community with integrity and respect.
In conclusion, whether you're facing water damage, fire damage, or any other restoration challenge, SERVPRO of Santa Ynez/Goleta offers the expertise, technology, and compassionate service needed to bring your property back to its best. Their commitment to excellence and customer satisfaction makes them a reliable partner in your time of need.
SERVPRO of Santa Barbara and SERVPRO of Santa Ynez/Goleta are known for their expertise in controlling and removing odors after major fires
1/3/2024 (Permalink)
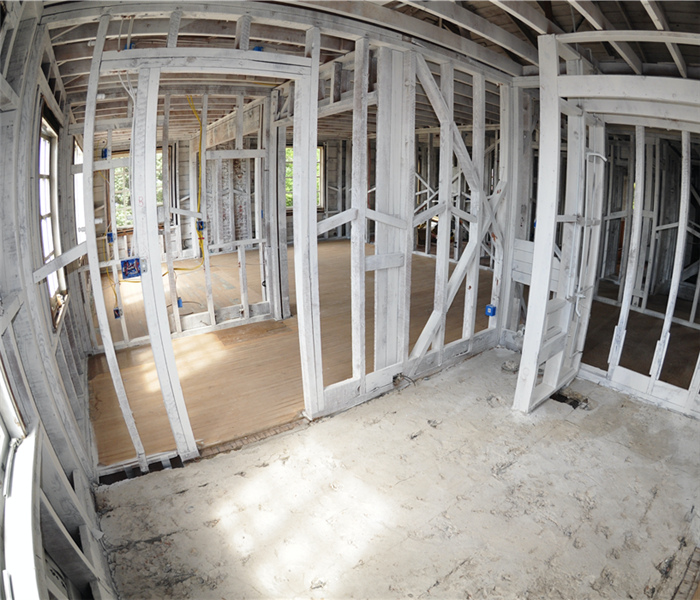 Framing that has been odor sealed after being soda blasted
SERVPRO of Santa Barbara and SERVPRO of Santa Ynez/Goleta are known for their expertise in controlling and removing odors after major fires. In the aftermath of a fire, the lingering smoke odor can be a significant issue, deeply embedded in the structure of a building. These franchises have developed a robust approach to ensure that this problem is thoroughly addressed, leaving homes not just looking new, but smelling fresh as well.The key to their success lies in their meticulous process which involves two critical steps: soda blasting and odor sealing the framing. Soda blasting is a gentle, yet effective, method used to clean off soot and char from surfaces without causing damage. It's an environmentally friendly solution that uses sodium bicarbonate (baking soda) to effectively remove the remnants of fire damage from various surfaces.
After the soda blasting, the next crucial step is to odor seal the framing. This involves applying a specialized sealant to the frame of the house. This sealant acts as a barrier, locking in any residual odors and preventing them from permeating through the newly renovated or repaired areas. It's a critical step in the restoration process as it ensures that no smoke smell lingers, which could otherwise become a persistent and unpleasant reminder of the fire.
Skipping this process or not executing it correctly can lead to significant issues. A home may look completely restored on the outside, but the lingering smell of smoke can make it uncomfortable and uninhabitable. Moreover, once the reconstruction is complete, addressing these odors can be extremely challenging, often requiring parts of the restoration work to be redone.
SERVPRO of Santa Barbara and SERVPRO of Santa Ynez/Goleta understand the importance of these steps in the fire restoration process. They ensure that every job is handled with the utmost care and professionalism, using the latest techniques and equipment to guarantee that once a home is restored, it is free from any residual odors of smoke, making it a fresh and welcoming environment once again.
OUR SERVPRO® TEAM IS READY AND AVAILABLE
1/3/2024 (Permalink)
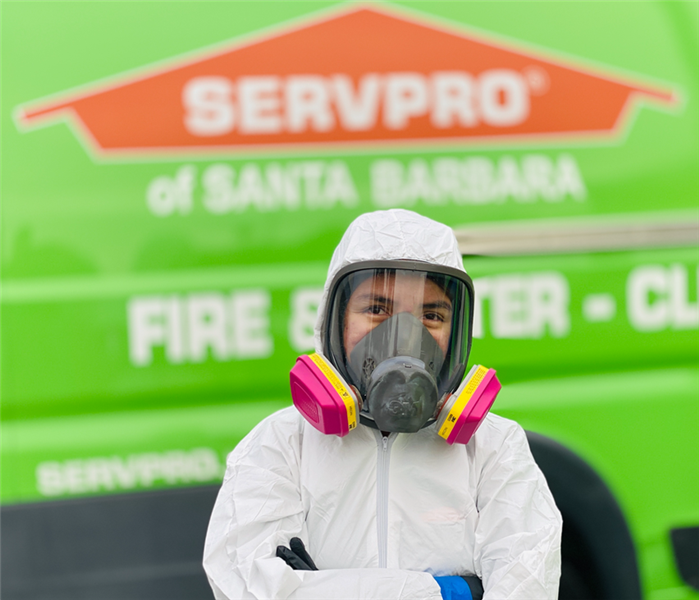
 SERVPRO team ready to help 24/7/365
SERVPRO of Santa Barbara and SERVPRO of Santa Ynez are renowned for their dedicated and hard-working employees, who are always ready to assist people in need, regardless of the time of day or even during holidays. These teams specialize in dealing with challenging situations, often working in wet, fire-damaged areas, and confined spaces. Their goal is to restore affected spaces to their original state, living up to their motto, "Like it never even happened."
The commitment of the SERVPRO team in these regions extends beyond mere clean-up efforts. They understand that their work is crucial in helping improve people's lives after unforeseen and often traumatic events. This understanding fuels their dedication and meticulous approach to every task.
The process typically begins with a thorough clean-up, addressing water damage, smoke, and soot from fires, or other forms of damage. The team's expertise ensures that they not only clean but also sanitize and deodorize the affected areas, ensuring a safe and healthy environment for the inhabitants to return to.
Following the clean-up, SERVPRO of Santa Barbara and Santa Ynez focuses on the rebuilding phase. This involves restoring the structural integrity of the buildings and taking care of aesthetic aspects to bring back the comfort and familiarity of the affected homes or businesses. The teams work tirelessly, often under challenging conditions, to ensure that life can return to normal as quickly and smoothly as possible.
The employees at SERVPRO of Santa Barbara and Santa Ynez are more than just workers; they are compassionate individuals who put their skills to use in helping others. Their readiness to help during emergencies, coupled with their professional expertise, truly makes a difference in the communities they serve. This dedication to service and excellence not only helps in restoring damaged properties but also brings hope and reassurance to those affected by disasters.
every step is important ...
1/3/2024 (Permalink)
 Every step counts when restoring property properly.
Success in mitigation begins with choosing SERVPRO, where excellence is a priority. Our team, committed and meticulous, ensures that every necessary step is followed to complete the job with precision and within budget. We believe in the importance of each step in the process - skipping steps may appear to speed up the process, but it compromises quality and can lead to future issues. Trust in our thorough approach for results that are not only swift but also enduring and reliable.
How Can I Benefit from Installing a French Drain as a Homeowner in Santa Barbara?
12/28/2023 (Permalink)
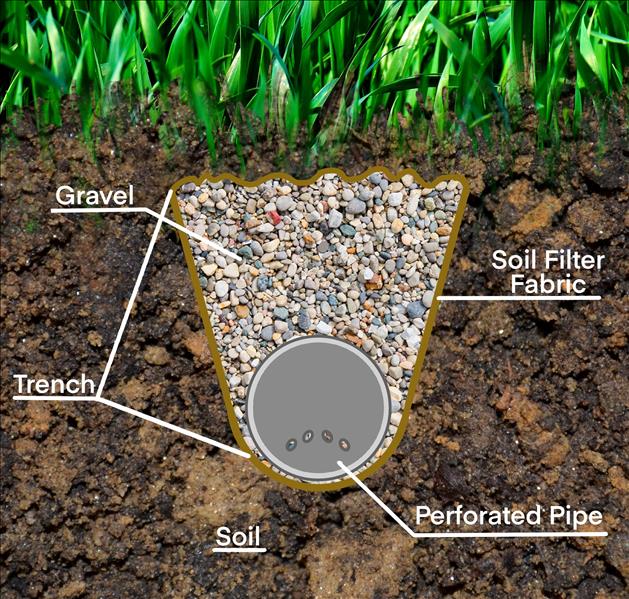 A simple example of what a french drain looks like.
A French drain can be an effective tool in helping to prevent flooding, particularly in areas where excess water accumulation is a concern. Here's how a French drain can help prevent flooding:
Redirecting Water: A French drain is designed to redirect water away from a specific area, such as the foundation of a building or a low-lying yard. When installed correctly, it can intercept and collect water before it has a chance to pool or flood the area.
Managing Groundwater: French drains are commonly used to manage groundwater around buildings. They can prevent water from seeping into basements or crawl spaces, reducing the risk of indoor flooding during heavy rain or high water table conditions.
Preventing Soil Saturation: In yards and gardens, French drains can help prevent soil saturation, which can lead to waterlogging and surface flooding. By draining excess water away, they keep the soil at an optimal moisture level.
Controlling Erosion: French drains are effective in preventing erosion by redirecting water and preventing soil from being washed away during heavy rainfall.
Flood Mitigation: In areas prone to localized flooding, properly designed and installed French drains can divert water away from vulnerable spots, reducing the risk of flooding during heavy rain events.
However, it's important to note that the effectiveness of a French drain in flood prevention depends on several factors, including the drain's design, capacity, and location. Additionally, a French drain may not be a standalone solution for preventing flooding in all situations. It is often part of a broader drainage system that includes proper grading, surface drainage, and other measures.
The combination of the risk of wildfires in the summer, heavy rain in the winter, and the rolling landscape of Santa Barbara significantly heightens the risk of flooding for homeowners. When wildfires scorch the landscape, they leave behind a charred and barren terrain that cannot effectively absorb or retain rainwater. Consequently, when heavy rainfall occurs, the water quickly runs off the hillsides, picking up ash, debris, and soil, which can clog drainage systems and culverts. This accelerated runoff can lead to flash floods, inundating residential areas and putting homes at risk of water damage. The hilly topography further exacerbates the situation by channeling water downhill, increasing the likelihood of flooding in lower-lying neighborhoods, making it imperative for homeowners to be prepared for these flood-related risks in Santa Barbara.
I Just Heard the Term "Black Water." What Does this Mean?
12/28/2023 (Permalink)
 Water that comes from a toilet is always considered black water.
Black, gray, and white water are terms used to categorize wastewater based on its source and level of contamination:
Black Water:
- Black water is the most contaminated type of wastewater and is typically associated with toilets and sewage from toilets.
- It contains human waste, toilet paper, and often includes pathogens (bacteria, viruses).
- Black water requires extensive treatment to make it safe for discharge or reuse, often involving sewage treatment plants.
Gray Water:
- Gray water is wastewater that comes from sources other than toilets. It includes water from sinks, showers, bathtubs, and washing machines.
- Gray water is less contaminated than black water but may still contain soap, detergents, and small amounts of organic matter.
- While not suitable for drinking, gray water can often be safely reused for purposes like landscape irrigation or toilet flushing with proper treatment or filtration.
White Water (Clean Water):
- White water, also known as clean water, refers to fresh, potable water that is safe for drinking and other domestic uses.
- It is not wastewater and does not contain contaminants. Instead, it is the type of water typically supplied to households through water utility systems.
- White water is suitable for consumption, cooking, bathing, and other daily activities without posing health risks.
It's important to note that the appropriate management and treatment of each type of water are crucial to maintain environmental and public health standards. Proper wastewater treatment and responsible water usage practices help ensure that contaminants are removed, and clean water sources remain safe for human consumption and other essential needs.
Fire at Home: What's Next?
12/11/2023 (Permalink)
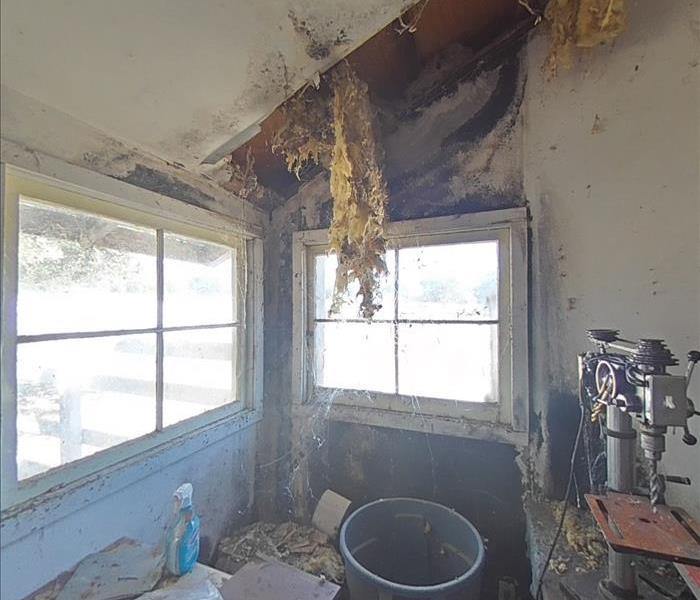
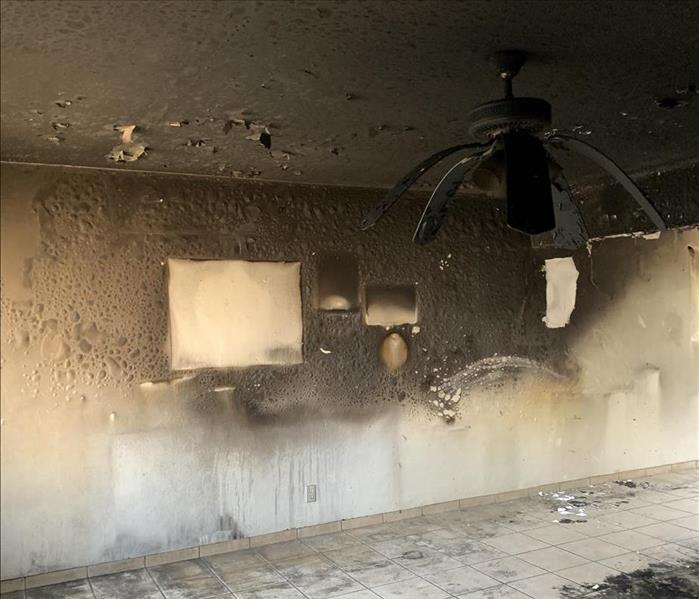 A home suffering from severe fire damage.
Once the firefighting process is complete, you’ll begin to notice that the efforts to put out the fire may have left extensive water damage along with the burnt remains of your kitchen or bedroom or in some cases your whole home. Every fire damage event varies, but most often the restoration process remains the same for each. Here are the typical steps involved in making fire damage in your home feel Like it never even happened.®
Call your insurance company:
Immediately notify your insurance provider about a home fire to initiate the claims process, document the damages, and secure timely assistance. This ensures comprehension of your coverage, adherence to legal obligations, and facilitates a prompt response.
Call SERVPRO:
Then call SERVPRO. Be sure to provide as much information about the damage as possible so that we may arrive quickly and fully prepared.
Assessment and Inspection:
Our professionals will then begin to carefully assess the extent of the fire, smoke, and water damage in order to create a detailed restoration plan.
Board-Up and Roof Tarping:
Our restoration team may board up missing walls, windows, and doors or tarp any damage to the roof to secure your property and prevent further damage.
Water Removal and Drying:
Water damage often occurs during firefighting efforts. Our team removes that excess water and uses dehumidifiers and air movers to dry the affected areas.
Smoke and Soot Removal:
We use specialized equipment and cleaning agents to remove smoke and soot residue from surfaces.
Cleaning and Sanitizing:
The restoration team cleans and sanitizes all salvageable items and structures that were damaged by the fire, and fogging equipment and air scrubbers are used to eliminate odor.
Structural Repairs:
Structural damage is then assessed so that we can begin the reconstruction process. This may involve small repairs like installing new tile in the kitchen or large repairs such as the reconstruction of multiple rooms from top to bottom.
From your very first call to SERVPRO to the last handshake after the restoration process in your home is complete, we will take the utmost care and respect throughout the entire process so you can feel confident in your home from then on.
Detecting Hidden Water Damage: The Critical Role of Technology in Early Identification
11/17/2023 (Permalink)
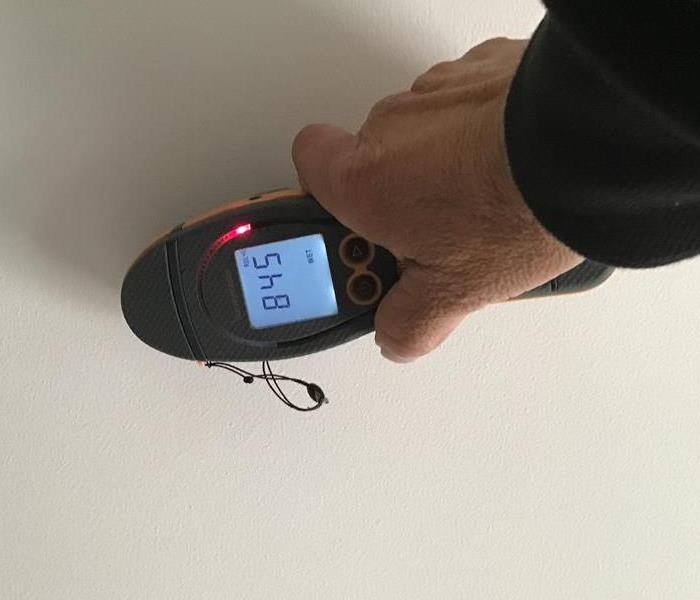 Protimeter Moisture meter used to check a water damaged wall
At SERVPRO of Santa Barbara and SERVPRO of Santa Ynez/Goleta, we understand that water damage can be a silent yet destructive force in your property. Often, the signs of water damage are not immediately apparent, and if left unchecked, they can escalate into more significant and costly problems. Our goal is to help you identify and address these issues promptly, ensuring the safety and integrity of your building.
The Invisible Threat
Water damage can be deceptive. In its early stages, it might not show any visible signs, lulling property owners into a false sense of security. However, moisture has a way of seeping into hidden parts of a structure, like behind walls, under flooring, or in ceiling spaces. If unattended, this hidden moisture can weaken structural components, ruin materials, and create an ideal environment for mold growth, which can occur in as little as 48 hours.
The Power of Technology
To combat these hidden threats, SERVPRO employs state-of-the-art technology:
Protimeter Moisture Meters: These sophisticated devices are critical in our toolkit. They precisely measure the moisture content in various building materials. By detecting abnormal moisture levels, we can identify potential water damage even when it's out of sight.
FLIR Infrared Cameras: These cameras are invaluable for quickly scanning large areas to detect temperature differences. Water evaporation causes cooling, so wet areas often show up as cooler spots in thermal imaging. This method allows us to pinpoint areas of concern that might otherwise go unnoticed.
Early Detection: A Cost-Effective Approach
The key to managing water damage is early detection. By identifying and addressing moisture issues early on, we can prevent more extensive damage and costly repairs. Early intervention also minimizes the disruption to your daily life or business operations, making the remediation process less invasive.
The Dangers of Mold
One of the most significant risks of unaddressed water damage is mold growth. Mold can start developing within 48 hours in the right conditions, posing potential health effects and further property damage. By using our advanced detection methods, we can help mitigate this risk effectively.
Why Choose SERVPRO
At SERVPRO of Santa Barbara and SERVPRO of Santa Ynez/Goleta, we combine our expertise with cutting-edge technology to offer you the best in water damage detection and remediation. Our team is trained to handle water damage of any scale, ensuring a thorough and efficient process from start to finish.
Conclusion
Remember, the sooner water damage is addressed, the less expensive and invasive the drying and repair process will be. Don’t let hidden water damage compromise your property. Trust SERVPRO to provide the professional care and technological expertise needed to protect your investment.
How to use a Fire Extinguisher
11/17/2023 (Permalink)
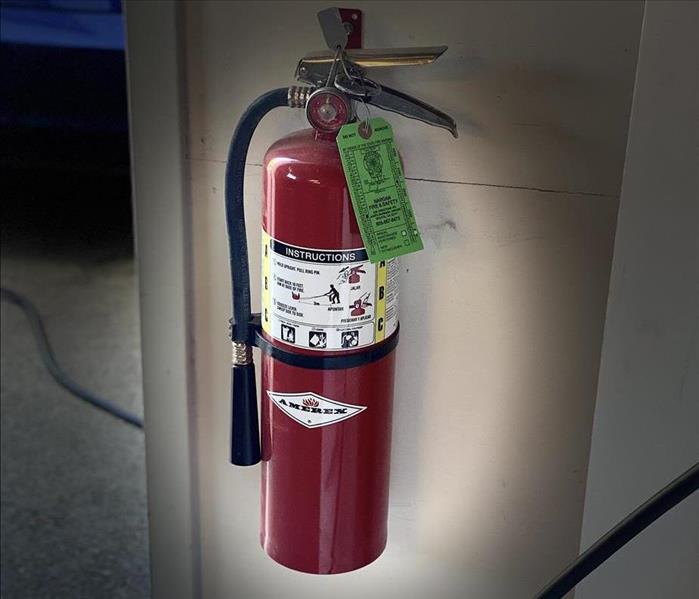 Fire extinguisher near a exterior exit door
A fire extinguisher is an essential safety device that can stop minor fires from becoming major emergencies. This guide will teach you the basic steps for using a fire extinguisher effectively.Remember "P.A.S.S." for Easy Recall
"P.A.S.S." is a simple mnemonic to remember the four key steps in operating a fire extinguisher:
- Pull the pin
- Aim at the fire's base
- Squeeze the handle
- Sweep side to side
Safety First
Before using a fire extinguisher, ensure everyone's safety and call the fire department for large or spreading fires. Note that fire extinguishers are designed for small fires only. If the fire grows quickly, evacuate and wait for professional assistance.
Using a Fire Extinguisher: Step-by-Step
Pull the Pin: The pin at the top of the extinguisher prevents accidental discharge. Remove it to activate the extinguisher.
Aim at the Fire's Base: Direct the nozzle or hose at the fire's base. Targeting the base tackles the fire's source, not just the visible flames.
Squeeze the Handle: This releases the extinguishing agent, which could be powder, foam, or carbon dioxide, depending on the extinguisher type.
Sweep Side to Side: While holding down the handle, sweep the extinguisher side to side, covering the fire's base. Continue even if the flames seem to diminish, ensuring the fire source is completely out.
Post-Extinguishing Measures
After extinguishing the fire, remain vigilant for any signs of reignition. If the fire relights, attempt to extinguish it again or evacuate and contact the fire department.
Understanding Extinguisher Limitations
It's crucial to recognize that fire extinguishers are only effective on small fires. They are not suitable for large or fast-spreading fires. Additionally, different types of fires require specific extinguishers, such as using a particular extinguisher for grease fires versus electrical fires.
In summary, knowing how to operate a fire extinguisher is vital for containing small fires and preventing them from escalating. Use the "P.A.S.S." method: pull the pin, aim at the base, squeeze the handle, and sweep side to side. Always be aware of the extinguisher's limitations and call for professional help if the fire becomes unmanageable.
Navigating Water Damage Restoration in Santa Barbara, California
11/17/2023 (Permalink)
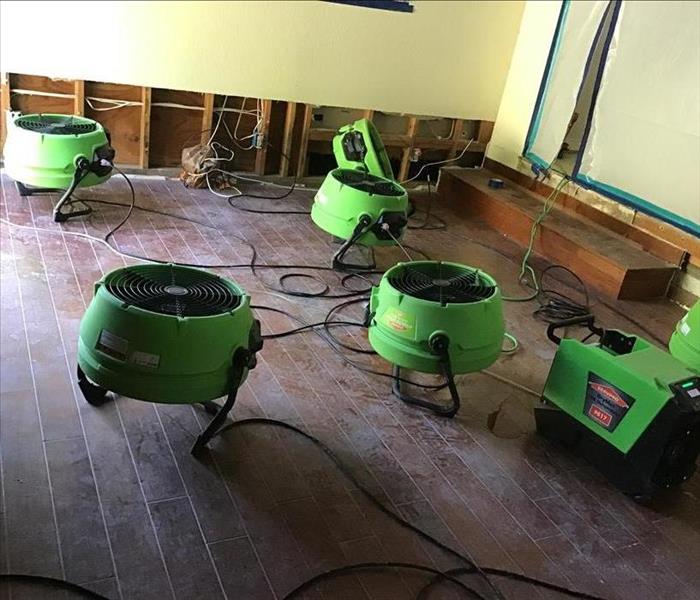 SERVPRO drying equipment set up
Experiencing water damage in your Santa Barbara property can be daunting. Water's ability to seep into materials like drywall, insulation, and furniture can exacerbate the issue, especially following incidents like burst pipes or toilet overflows. Addressing this effectively involves several critical steps.
1. Initial Water Removal
Start by eliminating as much water as possible. Utilize wet/dry vacuums or shop vacs to extract water. In cases of persistent standing water, resort to mops and buckets. Swift removal is key to mitigate further damage.
2. Dehumidification and Ventilation
Reducing humidity is crucial. Deploy dehumidifiers to lower moisture levels, which are essential in preventing mold growth. Absent dehumidifiers, use fans and open windows to enhance air circulation. Promptly remove wet textiles, including clothes and carpets, as they can retain moisture and foster mold.
3. Disinfection and Sanitization
After water removal, disinfect and sanitize affected areas. Employ suitable disinfectants for surfaces like countertops and floors. For mold concerns, especially on walls or ceilings, ensure thorough drying before treatment. In persistent mold cases, professional assistance, such as from SERVPRO of Santa Barbara, is advisable.
4. Repair or Replacement of Damaged Items
Assess whether items need repair or replacement. Irreparable items, including soaked carpets or damaged drywall, should be replaced. For salvageable items, clean and sanitize them carefully, avoiding harsh chemicals that could cause additional damage.
5. Monitoring Post-Cleanup
Continuously monitor the affected area post-cleanup to ensure complete drying and to check for mold reemergence. This vigilance is essential for at least a week following the incident.
6. Prompt Action is Essential
Quick response to water damage is critical to prevent escalation, which can lead to structural damage and mold proliferation—both costly to remedy.
For comprehensive assistance in water damage restoration in Santa Barbara, professionals like those at SERVPRO® are equipped to guide and assist in effectively managing such scenarios.
Guiding Steps for Wildfire Preparedness Through Creating a Defensive Zone Around Your Home
11/17/2023 (Permalink)
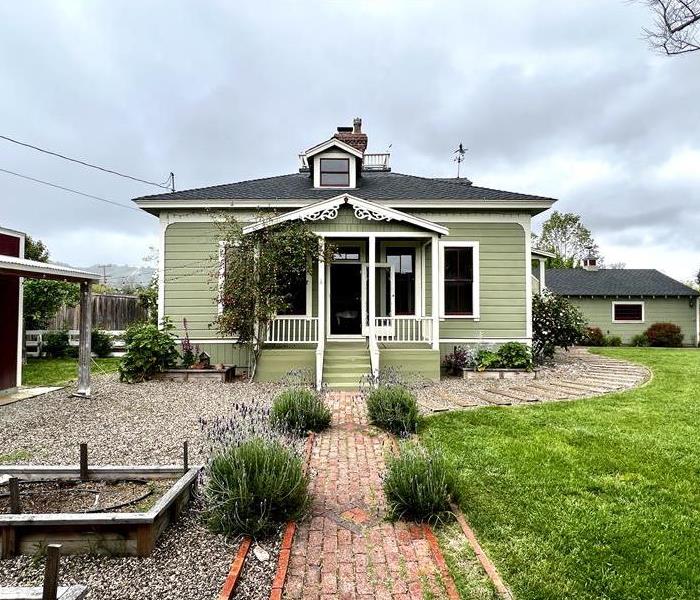 front of home with fire defensible landscaping
Wildfires, a common hazard in many regions of the U.S., pose unpredictable threats. Although the occurrence of these fires is beyond control, there are proactive measures you can implement to safeguard your home and family.
This guide outlines essential preparations for wildfire situations and strategies for establishing a defensive zone around your residence, significantly reducing the likelihood of property damage in the event of a wildfire.
Establishing a Fire-Resistant Perimeter
- Maintain a Clear Surrounding: Ensure a 30-foot radius around your home is devoid of flammable vegetation and debris.
- Regular Yard Upkeep: Remove dead foliage, trim branches, and maintain short grass (approximately three inches high).
- Tree and Shrub Management: Position trees and shrubs at least 10 feet from your home to prevent fire from spreading to the structure.
- Chimney Safety Checks: Annually inspect chimneys for adequate clearance from your home’s roof, eaves, and walls to mitigate the risk of chimney fires.
Insurance Review and Risk Assessment
- Insurance Coverage Confirmation: Verify that your homeowner's insurance adequately covers your home, its contents, and any animals on your property.
- Landscape Hazard Identification: Assess your property for high-risk fire zones, difficult-to-access areas, and hidden spots like canyons or valleys.
Roof and Gutter Maintenance
- Regular Roof Inspections: Have your roof inspected annually, particularly in high wildfire risk areas.
- Debris Removal: Keep gutters and roofs free of dead leaves and debris.
Fire-Smart Landscaping
- Defensible Landscaping: Choose fire-resistant or moisture-rich plants (like palms) for your garden.
- Vegetation Control: Eliminate flammable vegetation, including dead trees and dry grasses, from your property.
Conclusion
By establishing a defensible space around your home, you can effectively shield your property and loved ones from the dangers of wildfires, while also minimizing potential property damage. This proactive approach is a crucial step in wildfire preparedness and safety.
How to Prepare for an Insurance Adjuster's Visit After a Water Damage Event
7/13/2023 (Permalink)
When you experience water damage to your home or business, the insurance claim process plays a crucial role in your recovery. Preparing for an insurance adjuster's visit after a water loss can help ensure a fair and accurate assessment of the damages. In this blog post, we will provide valuable tips on how to effectively prepare for an insurance adjuster's visit, maximizing your chances of a successful insurance claim.
Document the Initial Damage
Before the insurance adjuster arrives, document the initial damage by taking photographs or videos of the affected areas. Capture the extent of the water damage, including any standing water, damaged materials, and belongings. Ensure that the documentation is clear, well-lit, and captures all the necessary details. This evidence will support your claim and provide a clear visual representation of the damages for the insurance adjuster to review.
Compile Relevant Information
Gather all relevant information and documents related to the water damage loss. This includes your insurance policy, any photographs or videos taken during the incident, receipts for emergency repairs or services, and any communication you've had with your insurance company. Having all these documents readily available will help streamline the discussion with the insurance adjuster and ensure that you provide accurate information to support your claim.
Make a Detailed List of Damaged Items
Create a comprehensive list of all items affected by the water damage, including furniture, appliances, electronics, and personal belongings. Provide as much detail as possible, including the item's description, age, value, and any pre-existing damage. This inventory will help you accurately assess the value of your loss and ensure that you don't miss any items during the assessment. Having a detailed list will also demonstrate your thoroughness and organization to the insurance adjuster.
Prepare to Answer Questions
Anticipate the questions that the insurance adjuster may ask during their visit. Be prepared to provide a detailed account of how the water damage occurred, the timeline of events, and any actions you took to mitigate further damage. Answer questions honestly and accurately, providing any relevant documentation or evidence to support your statements. Stay focused on the facts and avoid making assumptions or exaggerating the extent of the damage. Clear and concise communication will help establish trust and credibility during the visit.
Preparing for an insurance adjuster's visit after a water damage loss is crucial for a successful claims process. By documenting the initial damage, compiling relevant information, making a detailed list of damaged items, and preparing to answer questions, you can present a strong case to the insurance adjuster. Effective preparation increases the likelihood of a fair and timely resolution to your water damage claim.
FAQs about Mold Damage
1/10/2023 (Permalink)
 Significant mold damage on a roof.
What is Mold?
Mold, a type of fungus, is a diverse organism found in various environments, thriving in the presence of moisture and organic material. Its structure comprises hyphae forming a mycelium network, facilitating nutrient extraction and growth. Mold plays a crucial ecological role by decomposing organic matter and contributing to the recycling of nutrients. In indoor settings, it can become a concern when excessive moisture leads to its proliferation on surfaces. Mold reproduces through airborne spores, and understanding its biology is key to effective management and prevention strategies.
What does mold typically need to grow?
- Moisture: Mold requires water or moisture to grow. Areas with consistent or excessive moisture, whether from leaks, condensation, or high humidity levels, are favorable for mold development.
- Warmth: Mold tends to flourish in warmer temperatures, with the optimal range for growth typically between 77 to 86 degrees Fahrenheit (25 to 30 degrees Celsius).
- Organic Material: Mold feeds on organic materials such as wood, paper, fabric, and other cellulose-rich substances. These materials provide nutrients that support mold growth.
- Poor Ventilation: Inadequate airflow can contribute to stagnant conditions, allowing moisture to accumulate and fostering an environment conducive to mold.
- Low Light: While mold can grow in the dark, it is not dependent on light for growth. Dark and concealed areas can provide suitable conditions for mold proliferation.
Where does mold tend to grow?
Mold is a ubiquitous presence in nature, thriving in diverse settings due to its adaptability. In the outdoors, mold finds ideal conditions for growth in moist environments, such as soil, decaying organic matter, and the surfaces of plants and trees. It plays a crucial role in the natural decomposition of dead plant material, contributing to the nutrient cycle. Indoors, mold can be found in hidden or poorly ventilated spaces, taking advantage of moisture from leaks, high humidity levels, or condensation.
Common places for mold to grow in your home include:
- Bathrooms: Due to frequent water exposure and high humidity levels.
- Kitchens: Particularly around sinks and areas prone to spills.
- Basements: Where dampness and poor ventilation are common.
- Crawl Spaces: Often dark, damp, and lacking proper airflow.
- Attics: Where leaks or inadequate ventilation can lead to moisture accumulation.
- Around Windows: Condensation on windows can create a suitable environment.
- Behind Walls: Leaks or water damage can create hidden pockets of moisture.
- Under Carpets: Especially if carpets are exposed to moisture.
- Around Pipes: Leaks or condensation around pipes can promote mold growth.
- In Areas Affected by Flooding: Flooded areas may remain damp, fostering mold.
Understanding these common locations helps in identifying and addressing potential mold issues before they become more significant.
What should I do if I find mold in my home?
When you find mold in your home call SERVPRO®. Their trained technicians use advanced equipment and techniques to efficiently contain and remove mold, ensuring a thorough cleanup. With a focus on safety and efficiency, they handle potentially harmful substances for you as well as provide preventive measures against future mold growth. In most cases you shouldn’t attempt to remove mold on your own. Mold cannot just be cleaned, it must be removed.
What if I suspect there is mold in my home, but I don’t see it?
Call a qualified testing company, they will come in and test the rooms of concern and in many cases can tell you what species of mold are in your home. If the mold test comes back indicating that you have high levels of mold in your home, call SERVPRO so you can get that mold removed with peace of mind.
Preventing Future Mold Problems:
To prevent mold recurrence, address the source of moisture:
- Remove porous materials and replace them with non-porous ones like vinyl or linoleum.
- Repair leaks in the foundation, roof, or walls to prevent moisture entry.
- Ensure adequate ventilation for appliances using water to control humidity levels.
- Consider using a dehumidifier in mold-prone areas.
- Keep windows open during warm weather for fresh air circulation.
Understanding the nature of mold, its growth conditions, and common locations in both indoor and outdoor environments is essential for effective mold management. When encountering mold issues at home, it is advisable to seek professional assistance, such as contacting SERVPRO, to ensure safe and efficient mold removal. Additionally, if mold is suspected but not visible, consulting a qualified testing company can provide valuable insights. Taking preventive measures by addressing the source of moisture, using non-porous materials, and maintaining proper ventilation can contribute to a healthier living environment and minimize the risk of recurrent mold problems.


 24/7 Emergency Service